搭建 Kubernetes 集群环境
Mr.Lee 2025-05-07 19:59:23 Kubernetes
书接上回, 上次咱们将 own-open-apis 项目, 并接入kubernetes 的环境中. 今天我们就为实验Pod调度, 来准备测试环境....
闲言少叙, 开始正文
我准备了三台虚拟机, 系统都是 Ubuntu 22.04 初始化配置大家可以移步 养成类虚拟机. 这里不再赘述了
# 配置机器
# 1. hostname
分别在三台机器中执行
# 设置 hostname
sudo hostnamectl set-hostname master
sudo hostnamectl set-hostname worker-1
sudo hostnamectl set-hostname worker-2

# 查看 hostname
hostnamectl

# 主机名解析
cat << EOF >> /etc/hosts
10.13.147.9   master
10.13.147.10  worker-1
10.13.147.11  worker-2
EOF

ping -c 1 master
ping -c 1 worker-1
ping -c 1 worker-2
1
2
3
4
5
6
7
8
9
10
11
12
13
14
15
16
17
18
19
2
3
4
5
6
7
8
9
10
11
12
13
14
15
16
17
18
19
| 系统 | 主机名 | IP | 内存 | 硬盘 |
|---|---|---|---|---|
| Ubuntu 22.04 | master | 10.13.147.9 | 4G | 20G |
| Ubuntu 22.04 | worker-1 | 10.13.147.10 | 4G | 20G |
| Ubuntu 22.04 | worker-2 | 10.13.147.11 | 4G | 20G |
集群环境中, 需要用
hostname来对机器做区分
# 2. 时钟同步
# 更新系统
sudo apt update && sudo apt upgrade
# 设置统一的东八区
sudo timedatectl set-timezone Asia/Shanghai
# 设置时钟同步
sudo apt install chrony -y
sudo systemctl start chronyd
1
2
3
4
5
6
7
2
3
4
5
6
7
集群环境中的必要工具
# 安装K3s
# 1. 安装Master节点
# 1. 安装K3s (使用ranher的镜像源来安装)
curl -sfL https://rancher-mirror.rancher.cn/k3s/k3s-install.sh | INSTALL_K3S_MIRROR=cn sh -
# 2. 验证
kubectl get nodes
1
2
3
4
2
3
4
# 2. 安装Worker节点
# 查看Master节点上的Token信息
cat /var/lib/rancher/k3s/server/node-token

# 分别在 10.13.147.10, 10.13.147.11 执行
curl -sfL https://rancher-mirror.rancher.cn/k3s/k3s-install.sh | INSTALL_K3S_MIRROR=cn K3S_URL="https://10.13.147.9:6443" K3S_TOKEN="K10a3cd781cd276f13c7246df237a79ded6e47d1742957d2a18194920d1ffe71356::server:1203cc46f806dfffcb9a1edf40f14717" sh -
1
2
3
4
5
6
2
3
4
5
6
这里遇到的坑: 因为几台虚拟机都是从同一个模版创建出来的, 默认的
hostname也是相同的. 导致 worker节点失败.
# 3. 安装K9s (可视化工具)
# 安装
# curl -sS https://webinstall.dev/k9s | bash
wget https://github.com/derailed/k9s/releases/download/v0.50.4/k9s_linux_arm64.deb
apt install ./k9s_linux_arm64.deb

# 复制K3s配置文件
sudo cp /etc/rancher/k3s/k3s.yaml ~/.kube/config
1
2
3
4
5
6
7
2
3
4
5
6
7
这里遇到的坑: 默认是没有这个文件的
~/.kube/config, K9s等客户端都要靠此文件 接入 kubernetes 集群, 所以这个文件是必须的
# 4. 安装 Helm
curl https://baltocdn.com/helm/signing.asc | gpg --dearmor | sudo tee /usr/share/keyrings/helm.gpg > /dev/null
sudo apt-get install apt-transport-https --yes
echo "deb [arch=$(dpkg --print-architecture) signed-by=/usr/share/keyrings/helm.gpg] https://baltocdn.com/helm/stable/debian/ all main" | sudo tee /etc/apt/sources.list.d/helm-stable-debian.list
sudo apt-get update
sudo apt-get install helm
1
2
3
4
5
2
3
4
5
# 5. 配置镜像加速
# 配置k3s镜像拉取代理(三台机)
sudo mkdir -p /etc/rancher/k3s && touch /etc/rancher/k3s/registries.yaml
cat << EOF >> /etc/rancher/k3s/registries.yaml
mirrors:
  "docker.io":
    endpoint:
      - "https://registry.cn-hangzhou.aliyuncs.com"
  "k8s.gcr.io":
    endpoint:
      - "https://registry.cn-hangzhou.aliyuncs.com/google_containers"
  "quay.io":
    endpoint:
      - "https://quay.mirrors.ustc.edu.cn"
EOF
1
2
3
4
5
6
7
8
9
10
11
12
13
14
2
3
4
5
6
7
8
9
10
11
12
13
14
三台机器都要, 拉取镜像嘛.....
# 部署应用
# 1. 宿主机打包应用
# 打包
❯ cd ci-cd/package/
❯ docker save striveonger/own-open-apis:1.0.0 -o striveonger-own-open-apis.tar
❯ ll
total 688528
-rw-r--r--  1 striveonger  staff   2.6K  5  9 14:25 own-open-apis-1.0.0.tgz
-rw-------  1 striveonger  staff   336M  5  9 14:32 striveonger-own-open-apis.tar
-rw-r--r--  1 striveonger  staff   525B  5  9 14:25 values.yaml
❯ tar -zcvf own-open-apis.tar package/
# 复制到测试环境
❯ scp own-open-apis.tar root@10.13.147.9:/root/development/workspace
1
2
3
4
5
6
7
8
9
10
11
2
3
4
5
6
7
8
9
10
11
# 2. 测试环境部署
# 解包
❯ cd development/workspace/
❯ ll
total 156M
-rw-r--r-- 1 root root  156M May  9 14:53 own-open-apis.tar
❯ tar -zxvf own-open-apis.tar
❯ cd package/
# 导入镜像
❯ k3s ctr image delete docker.io/striveonger/own-open-apis:1.0.0
docker.io/striveonger/own-open-apis:1.0.0
❯ k3s ctr image import striveonger-own-open-apis.tar
docker.io/striveonger/own open apis:1.0.	saved
application/vnd.oci.image.manifest.v1+json sha256:0b8c86091ab1179e1eabaff213002011f1b934c156034502c8774453269b36ac
Importing	elapsed: 1.8 s	total:   0.0 B	(0.0 B/s)
# 安装应用
❯ helm upgrade --install own-open-apis own-open-apis-1.0.0.tgz \
      --values values.yaml \
      --create-namespace --namespace own \
      --set app.config.applicationYaml.own.open-apis.storage.memory.max-rows=3
Release "own-open-apis" has been upgraded. Happy Helming!
NAME: own-open-apis
LAST DEPLOYED: Fri May  9 17:24:15 2025
NAMESPACE: own
STATUS: deployed
REVISION: 4
TEST SUITE: None
NOTES:
Helm chart `own-open-apis-1.0.0` install success...
1
2
3
4
5
6
7
8
9
10
11
12
13
14
15
16
17
18
19
20
21
22
23
24
25
26
27
28
2
3
4
5
6
7
8
9
10
11
12
13
14
15
16
17
18
19
20
21
22
23
24
25
26
27
28
# 成果展示
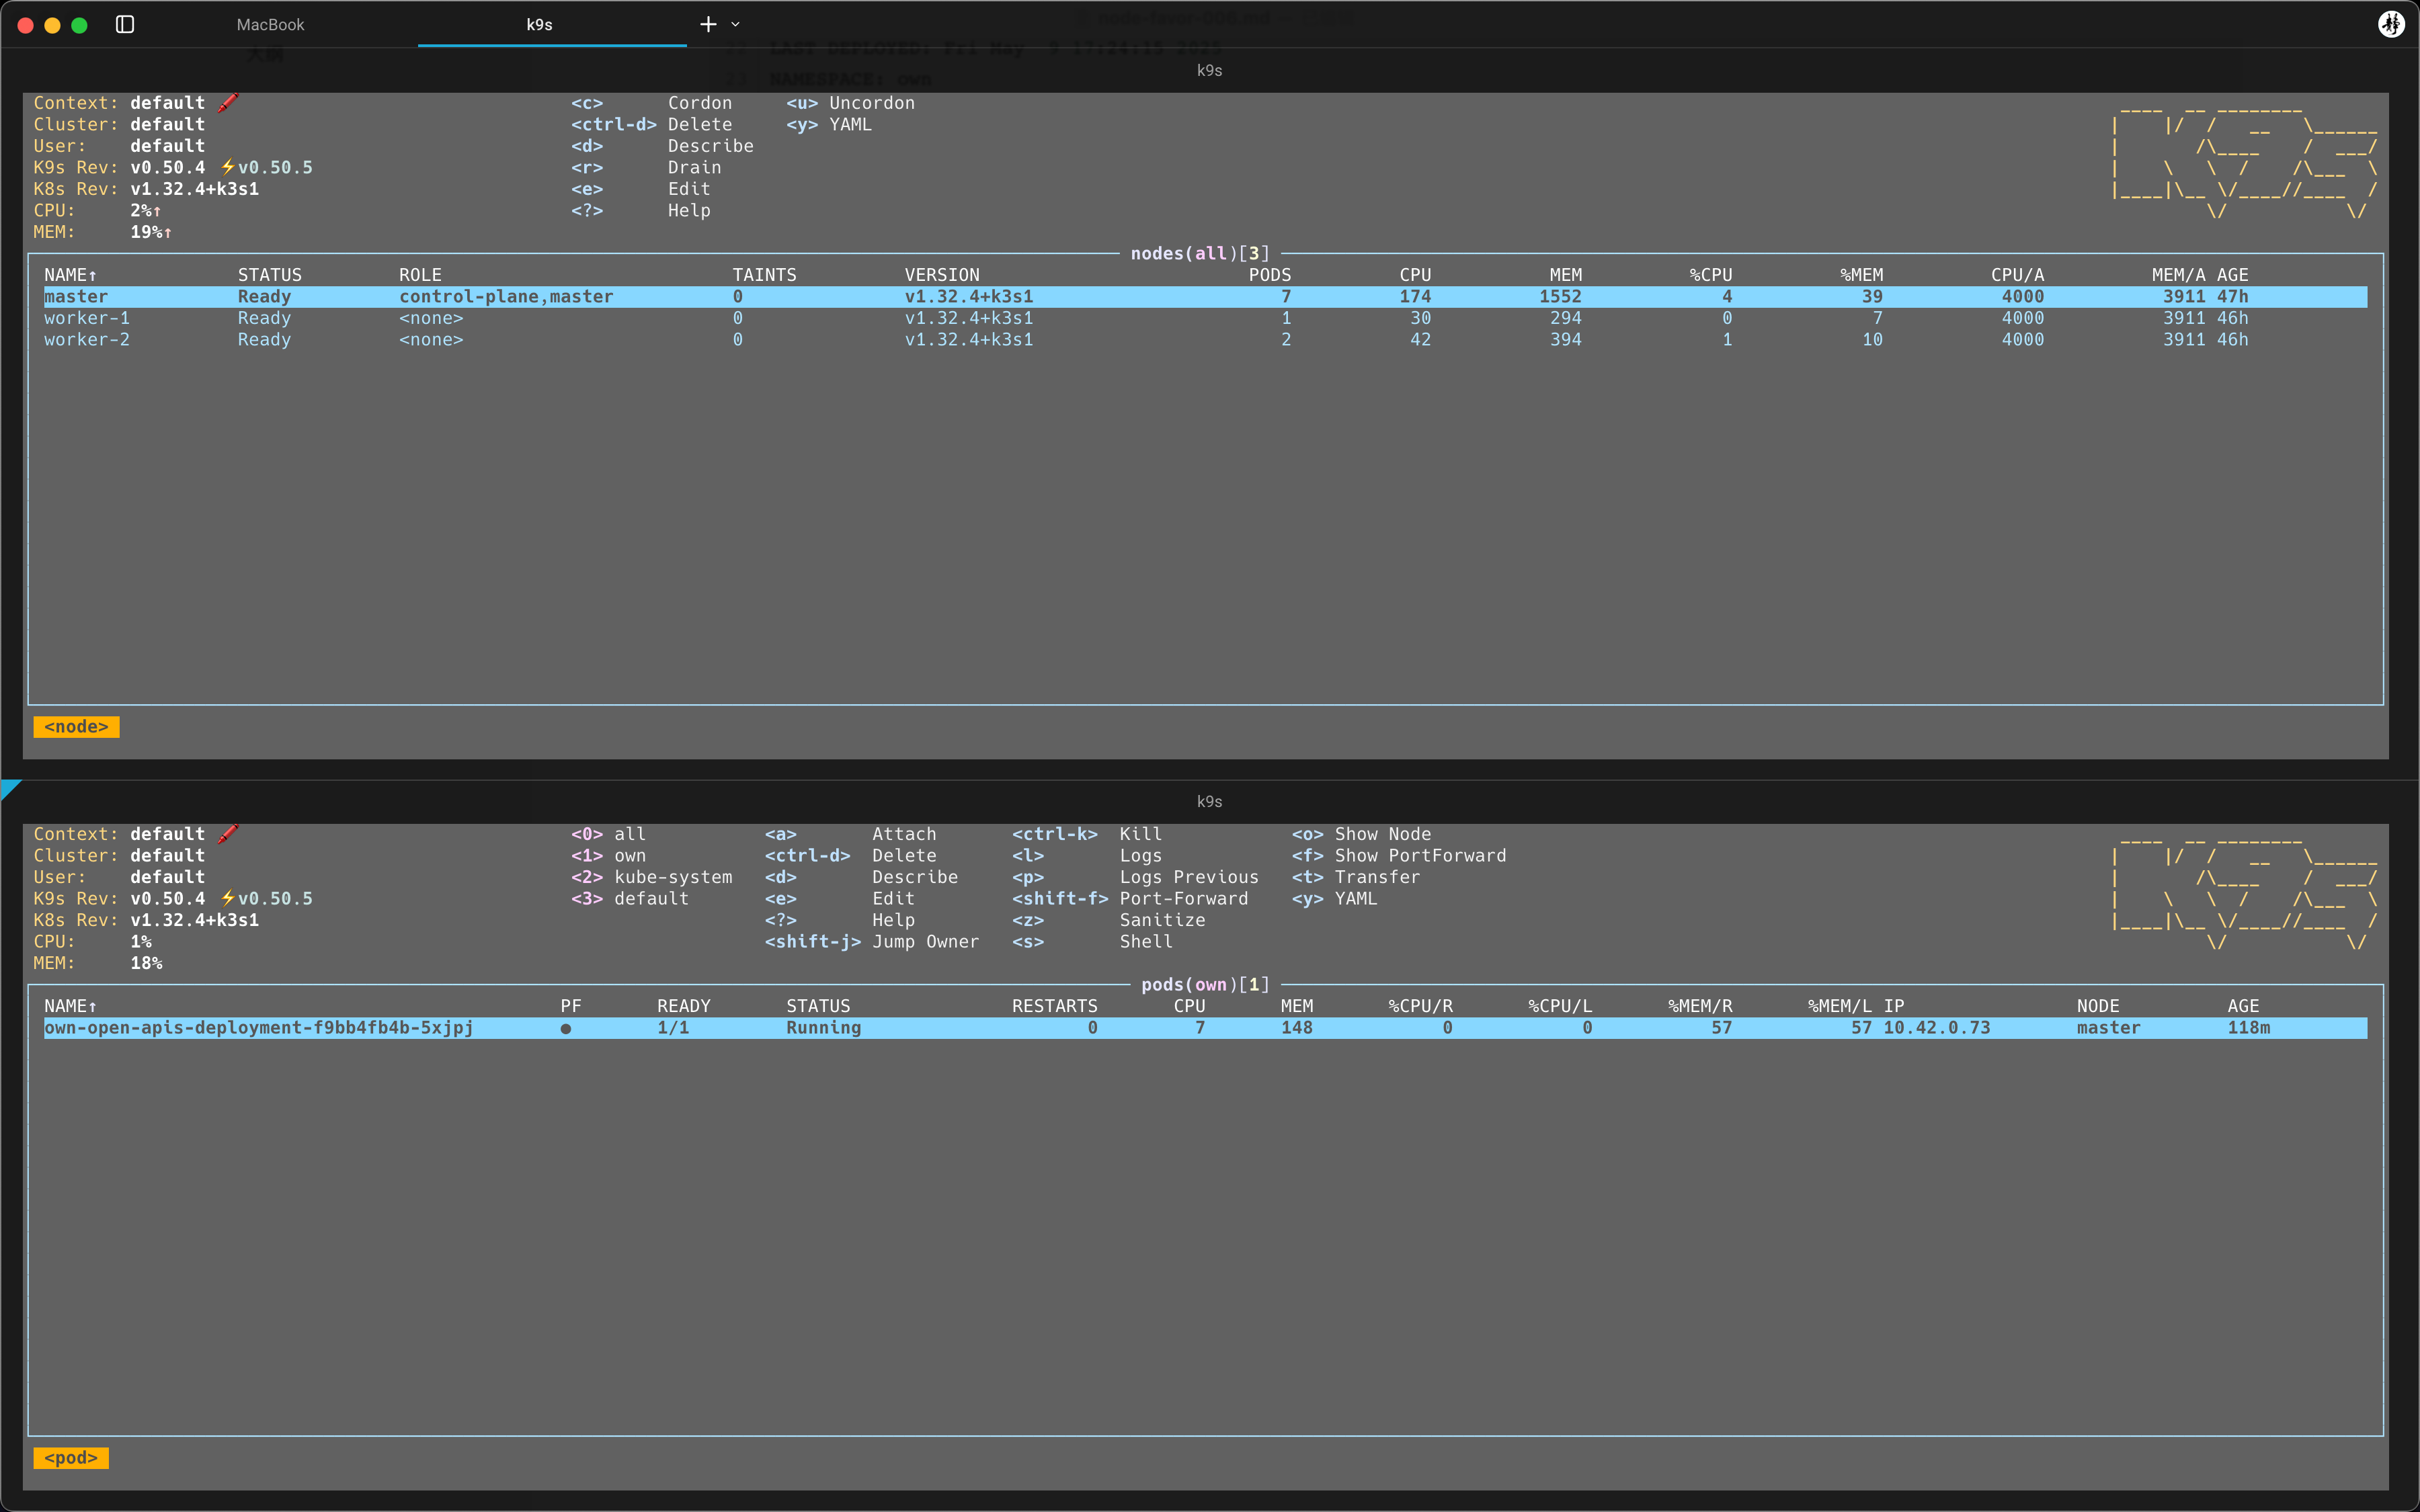
当然, 现在还是有问题的, 我只在
master节点导入了镜像. 如果Pod被调度到worker-*节点, 会出现ImagePullError的异常. 想要彻底解决这个问题, 就要引入 镜像私服 了...(诶嘿, 下期的选题这不就有了嘛~)